Languages:
 polski
A VPN (Virtual Private Network) service is available for both students and employees. It allows access to school resources from any place on the internet, as if the computer was connected to the PJWSTK network.
Automatic configuration for Windows system
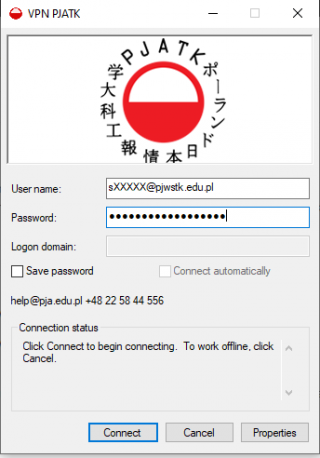
Simply install the PJWSTK-VPN application:
- for Windows Vista, Windows 7, Windows 8, Windows 10, Windows 11 (x64 64 bit)
- for Windows Vista, Windows 7, Windows 8, Windows 10 (x86 32 bit)
It enables access to both university resources and continued use of the internet connection. Additionally, it allows mapping of network drives.
Manual network drive mapping for Windows system
In case of problems with automatic drive mapping (e.g., drive letters p:, w:, or z: are already in use), manual mapping may be necessary.
The full access paths are:
\win-zet.pjwstk.edu.pl\Users\LOGIN – for drive z:
\win-zet.pjwstk.edu.pl\public – for drive p:
\www.pjwstk.edu.pl\LOGIN\ Where LOGIN is the user’s login name. It will be necessary to provide credentials from the PJWSTK domain.
Configuration in Ubuntu 18.4 system
In the Ubuntu system, we have the option to connect via the SSTP protocol. SSTP should work in networks where VPN connections are blocked.
VPN Configuration (SSTP) in Ubuntu 18.4 System
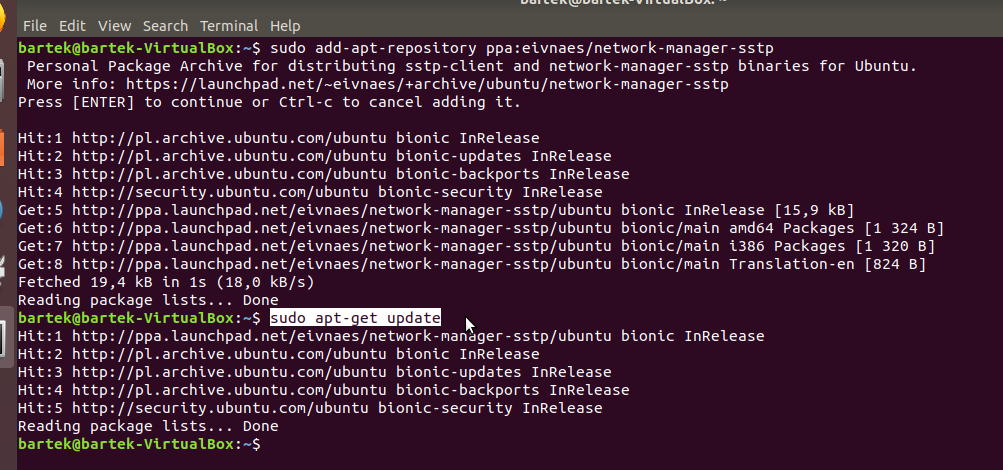
In Ubuntu 18.04, there are no default packages that allow for SSTP connection. They need to be installed. The simplest way is to add a new repository using the command:
sudo add-apt-repository ppa://eivnaes/network-manager-sstp

Adding the repository should be confirmed by pressing ENTER.
Next, we make sure that we have an up-to-date database of all packages
sudo apt-get update
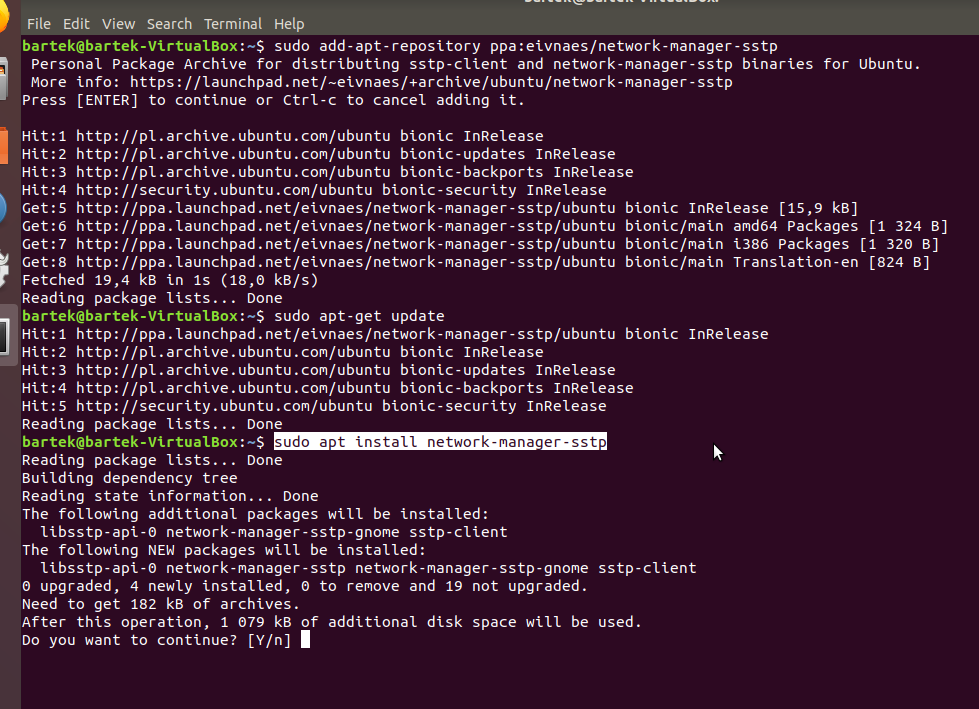
Then we install the network-manager-sstp package. All necessary packages will be installed along with it.
sudo apt install network-manager-sstp
We confirm the installation by pressing ENTER
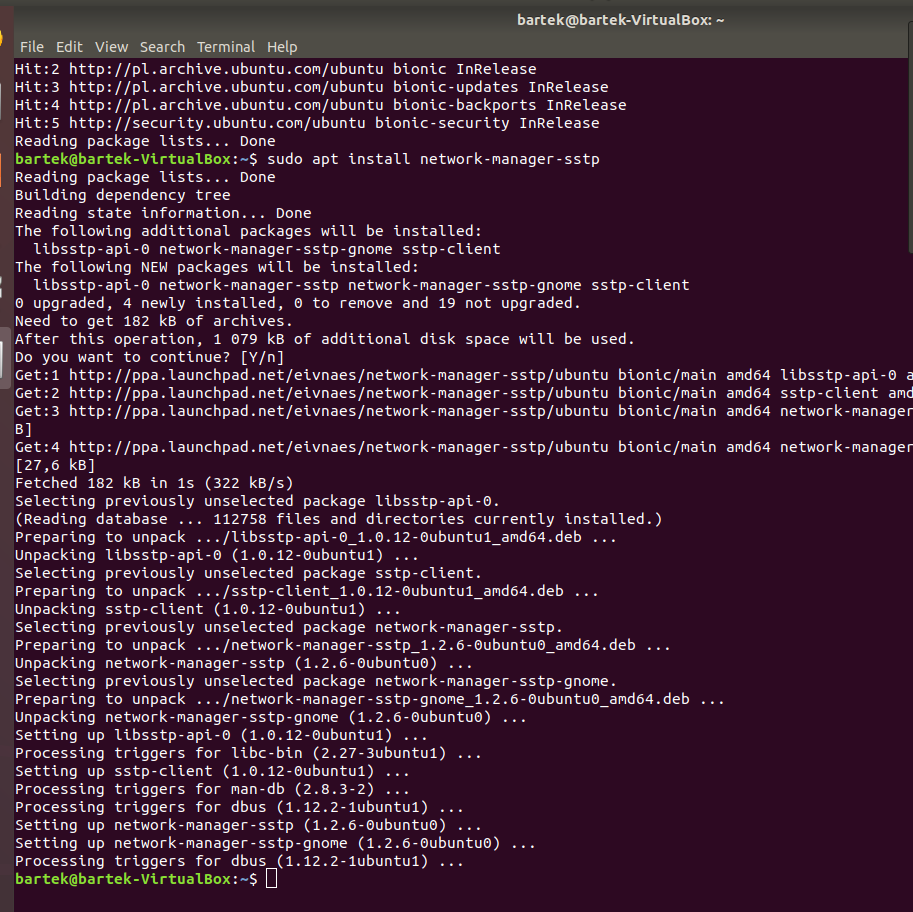
After successful installation, we should not see any error messages
To make Network Manager “see” the new SSTP VPN type, it needs to be restarted. In the console, you should enter the command:
sudo systemctl restart NetworkManager

Then we go to the network settings, for example by clicking on the notification bar and selecting the settings icon

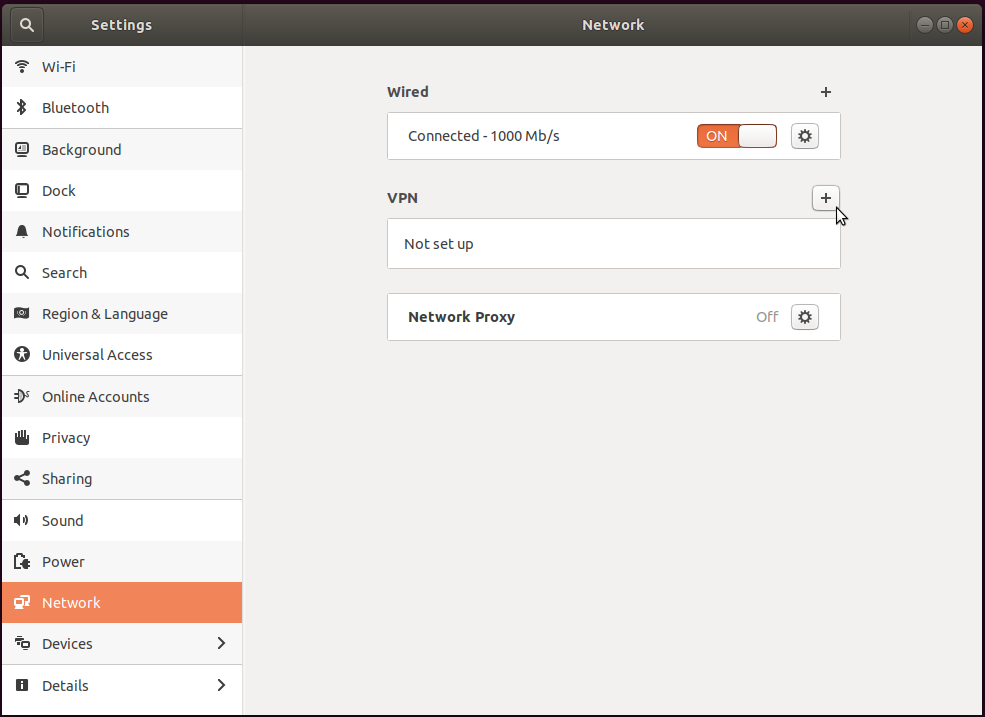
Then we go to the network settings and add a new VPN network using the button +
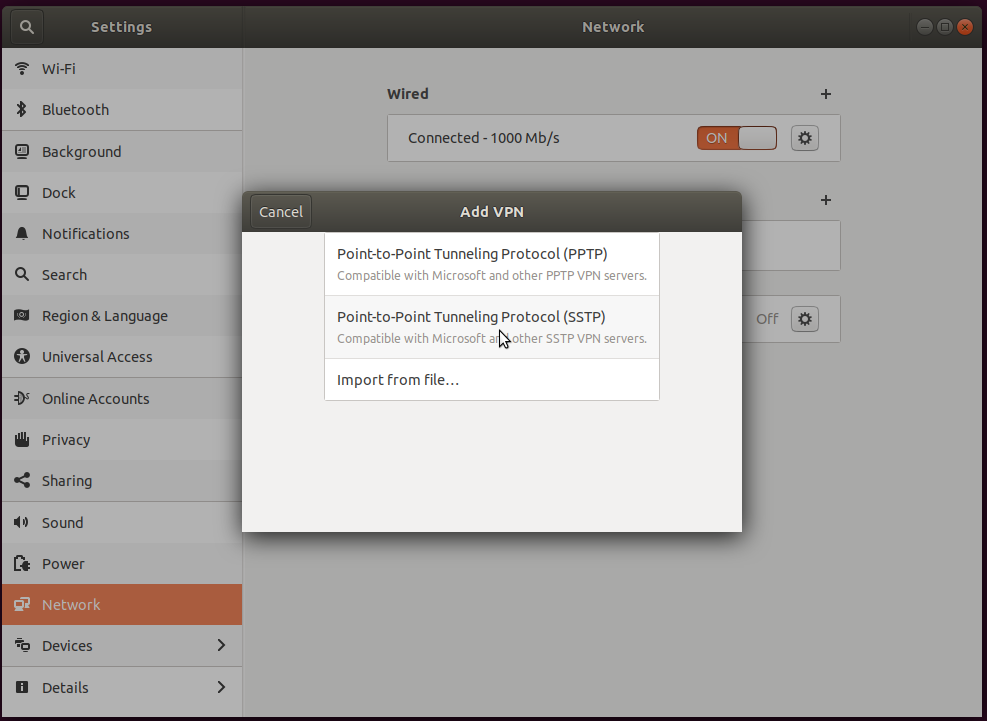
We select the SSTP protocol
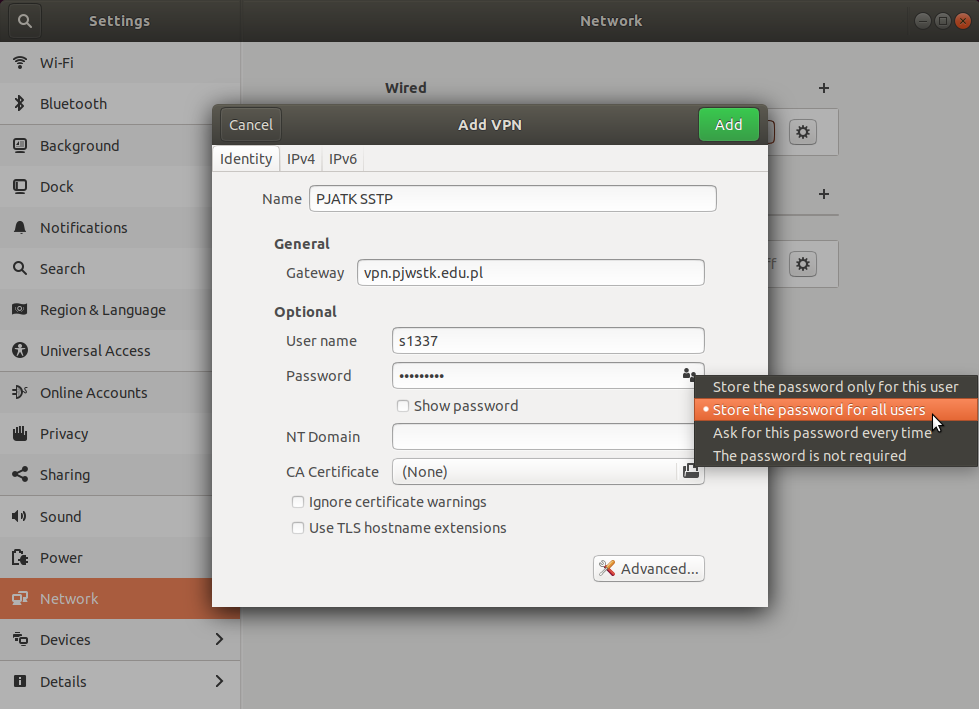
We fill in the data:
Name: a friendly name, e.g., PJATK SSTP
Gateway: vpn.pjwstk.edu.pl
Username: login, e.g., s1337
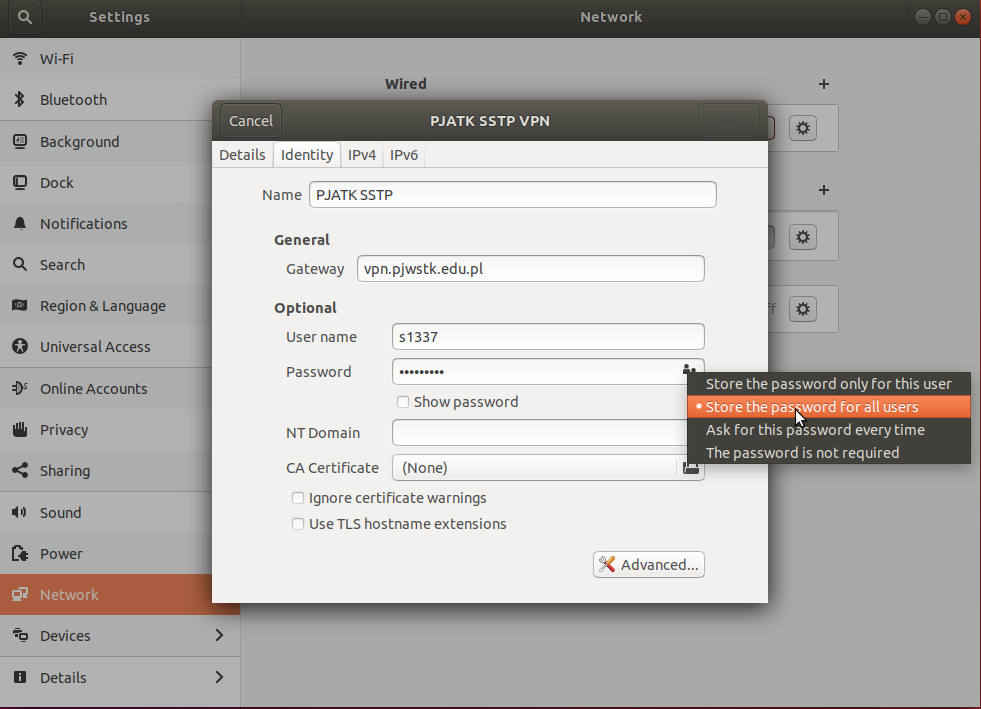
Password: Must be filled in and remembered for all users. Unfortunately, due to a bug in this package, other settings do not work correctly and do not allow for connection.
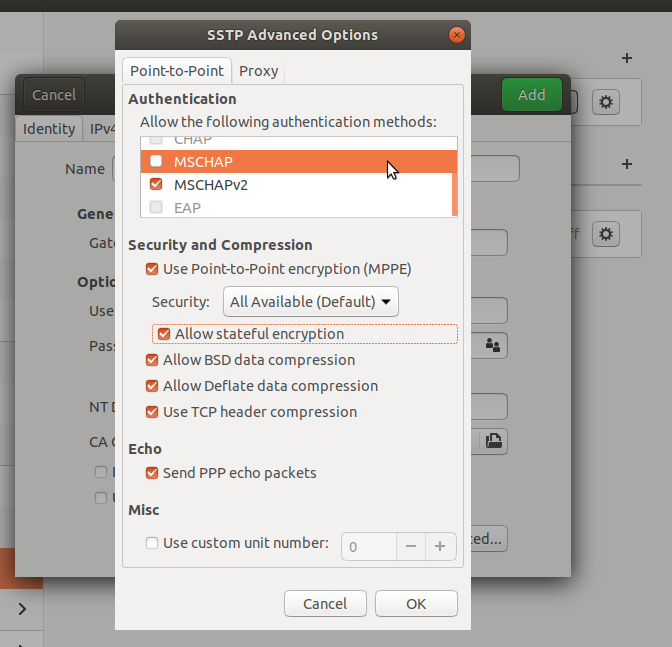
After going to “Advanced”, in the “Authentication” section, we select only MSCHAPv2, the rest of the protocols MUST be unchecked.
In the Security and Compression section, we check everything.
In the echo section, we check the only option.
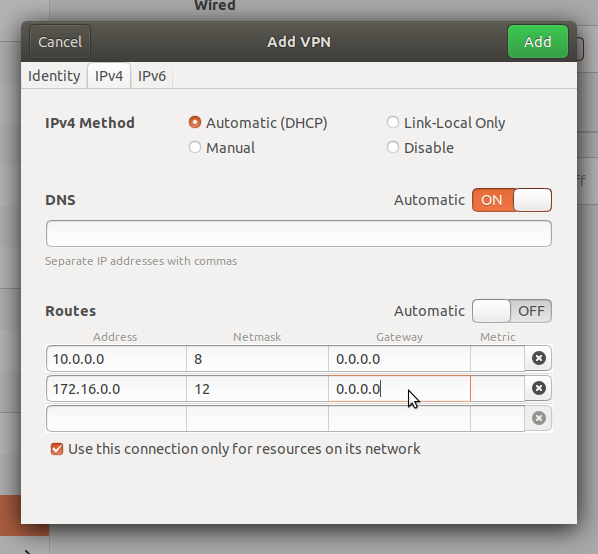
After confirming with OK, we move to IPv4 settings. Uncheck Automatic in the Routes section and manually enter the routes:
10.0.0.0 / 8 0.0.0.0
172.16.0.0 / 12 0.0.0.0
We check the option at the very bottom.
NOTE: After each confirmation of Add (Apply), the route entries will disappear. Each time, it is necessary to re-enter the Gateway as 0.0.0.0 for both routes.
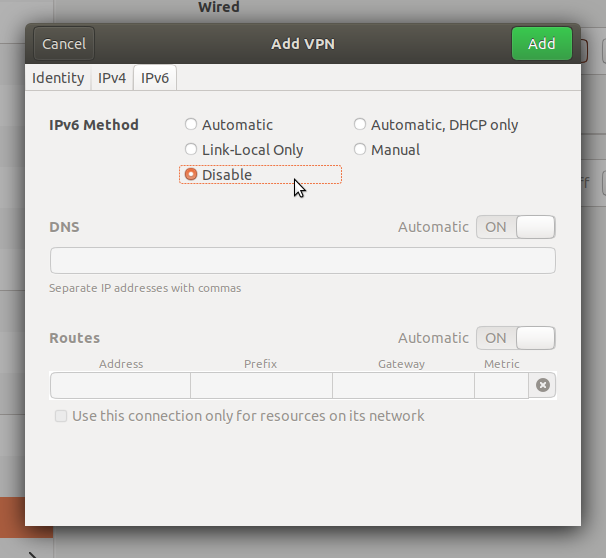
In the IPv6 tab, we select “Disable”. Our VPN currently does not support IPv6.
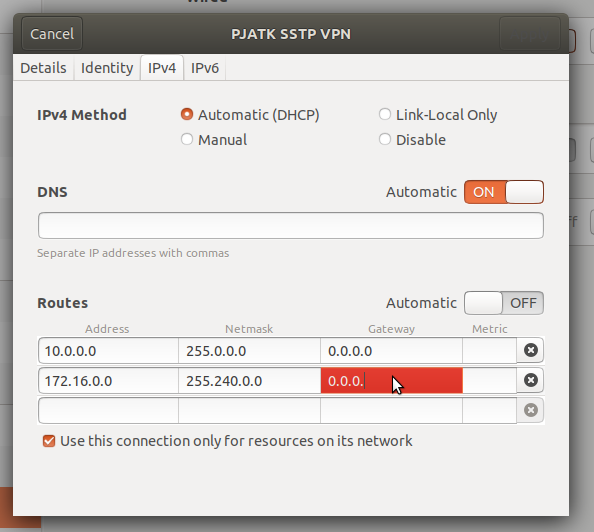
After confirming with APPLY, if we re-enter any connection settings, we MUST go to the IPv4 tab. We will see that the “Apply” button is grayed out, and the GATEWAY fields in “ROUTES” are highlighted in red. We need to re-enter 0.0.0.0 for all routes. Then the red highlighting will disappear, and the Apply button will turn green.
Similarly, the password remember setting may disappear. It should also be entered each time and it’s necessary to check the option “Store the password for all users”
We can start the connection in the settings by sliding the switch to ON or directly from the notification bar. After connecting, a small padlock will be visible next to the network connection.
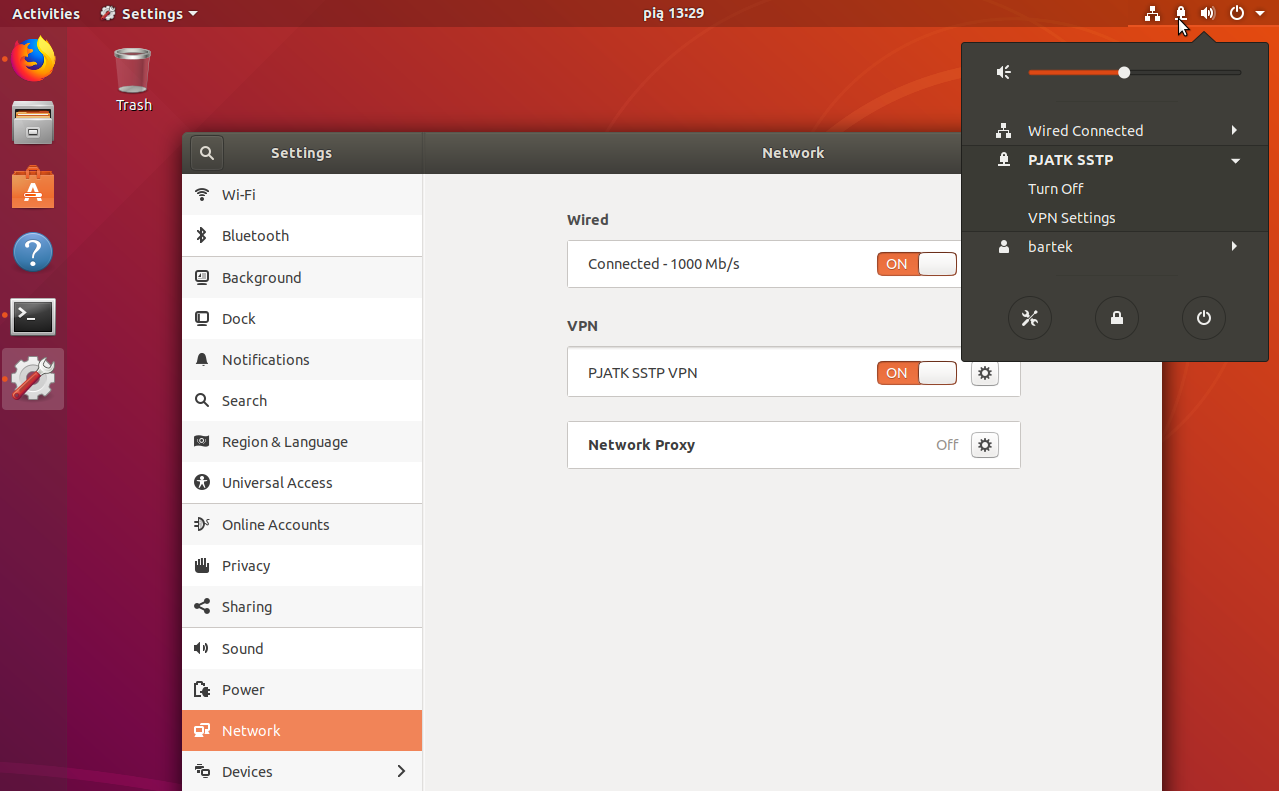
Now we can connect to the VPN to use our school’s services 🙂
NOTE: If you cannot edit this tab, check if there isn’t a “closed padlock” in the bottom left corner of the window. If so, before making changes, click on it and enter the administrator password, this will allow you to unlock the settings.
MacOS
Languages:
 polski

