VPN on Linux
Introduction
To access university resources from home, you need to configure a VPN connection.
Supported Systems
This guide covers Debian and its derivatives (Ubuntu, Linux Mint, Pop!_OS, etc.).
Configuration Guide
Install Packages
Open a terminal and install the required SSTP client packages:
sudo apt install sstp-client network-manager-sstp network-manager-sstp-gnomeRestart Network
Restart your computer or log out and log back in to ensure the Network Manager plugins are loaded.
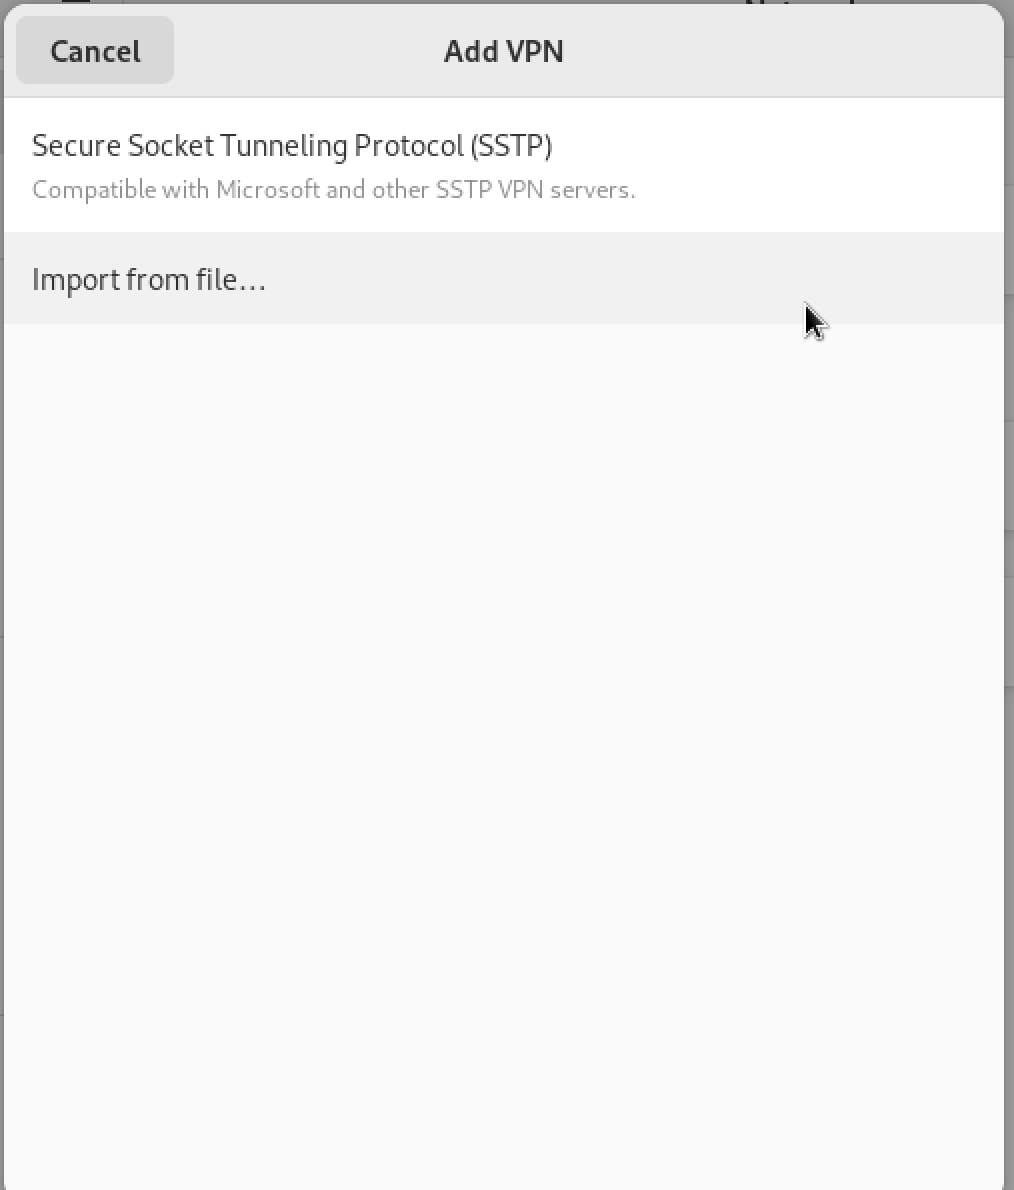
Add Connection
- Open Settings → Network → VPN.
- Click + and select SSTP VPN.
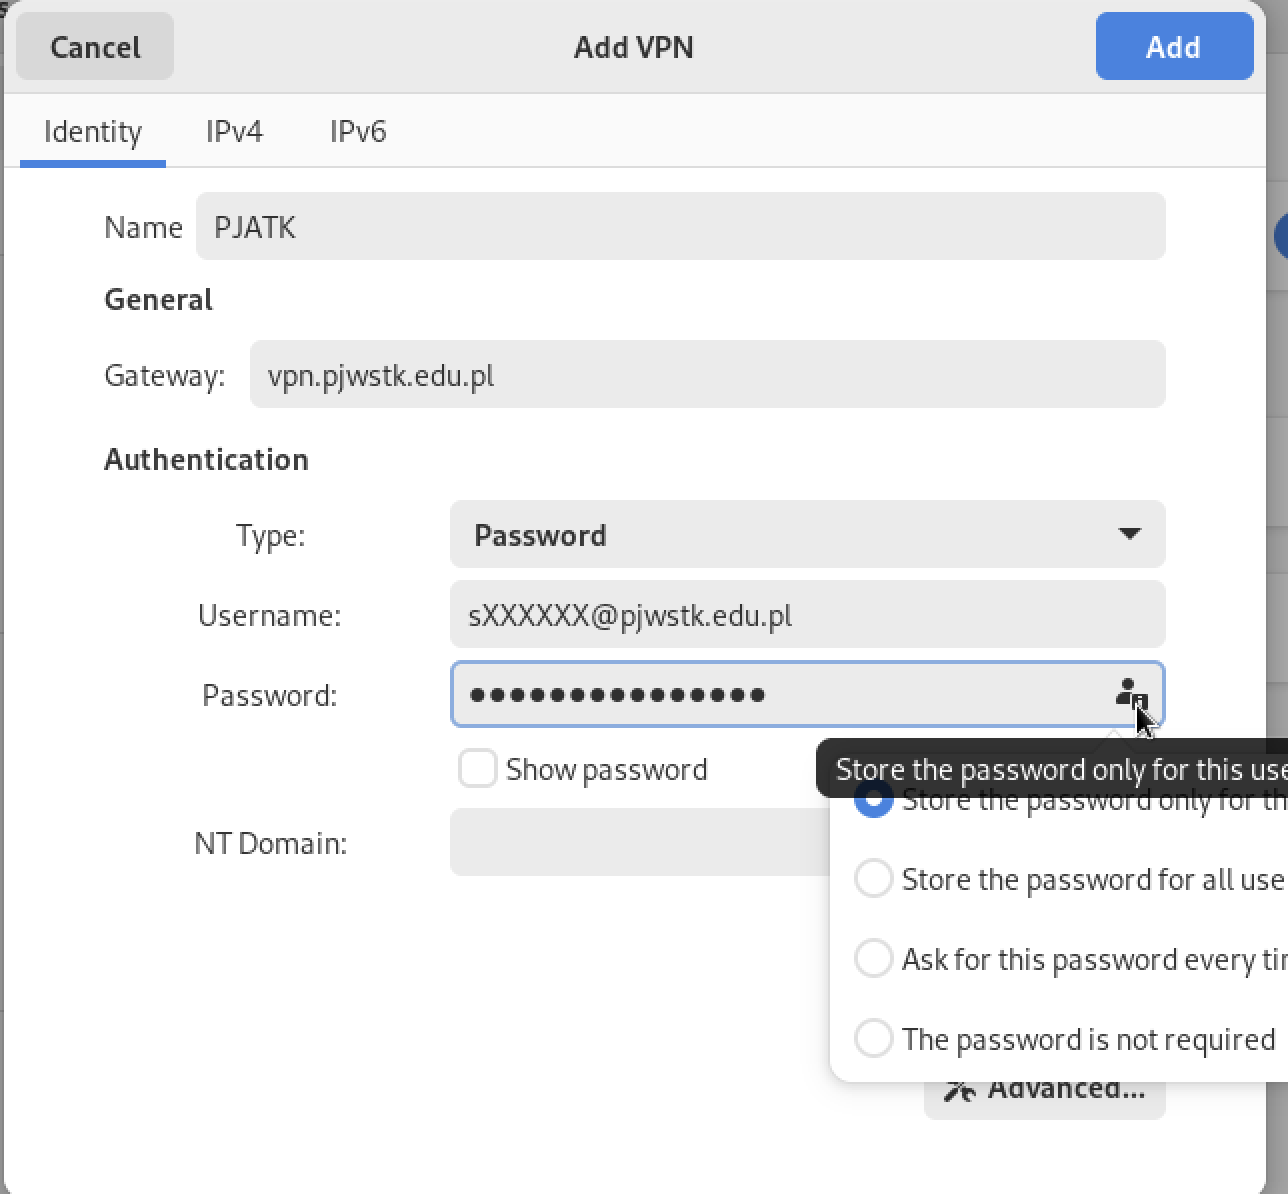
Basic Settings
Enter the following details:
- Connection name:
PJWSTK VPN - Gateway:
vpn.pjwstk.edu.pl - Username:
sXXXXX@pjwstk.edu.pl - Password: Your PJWSTK password
Check: “Store password only for this user” (optional but recommended).
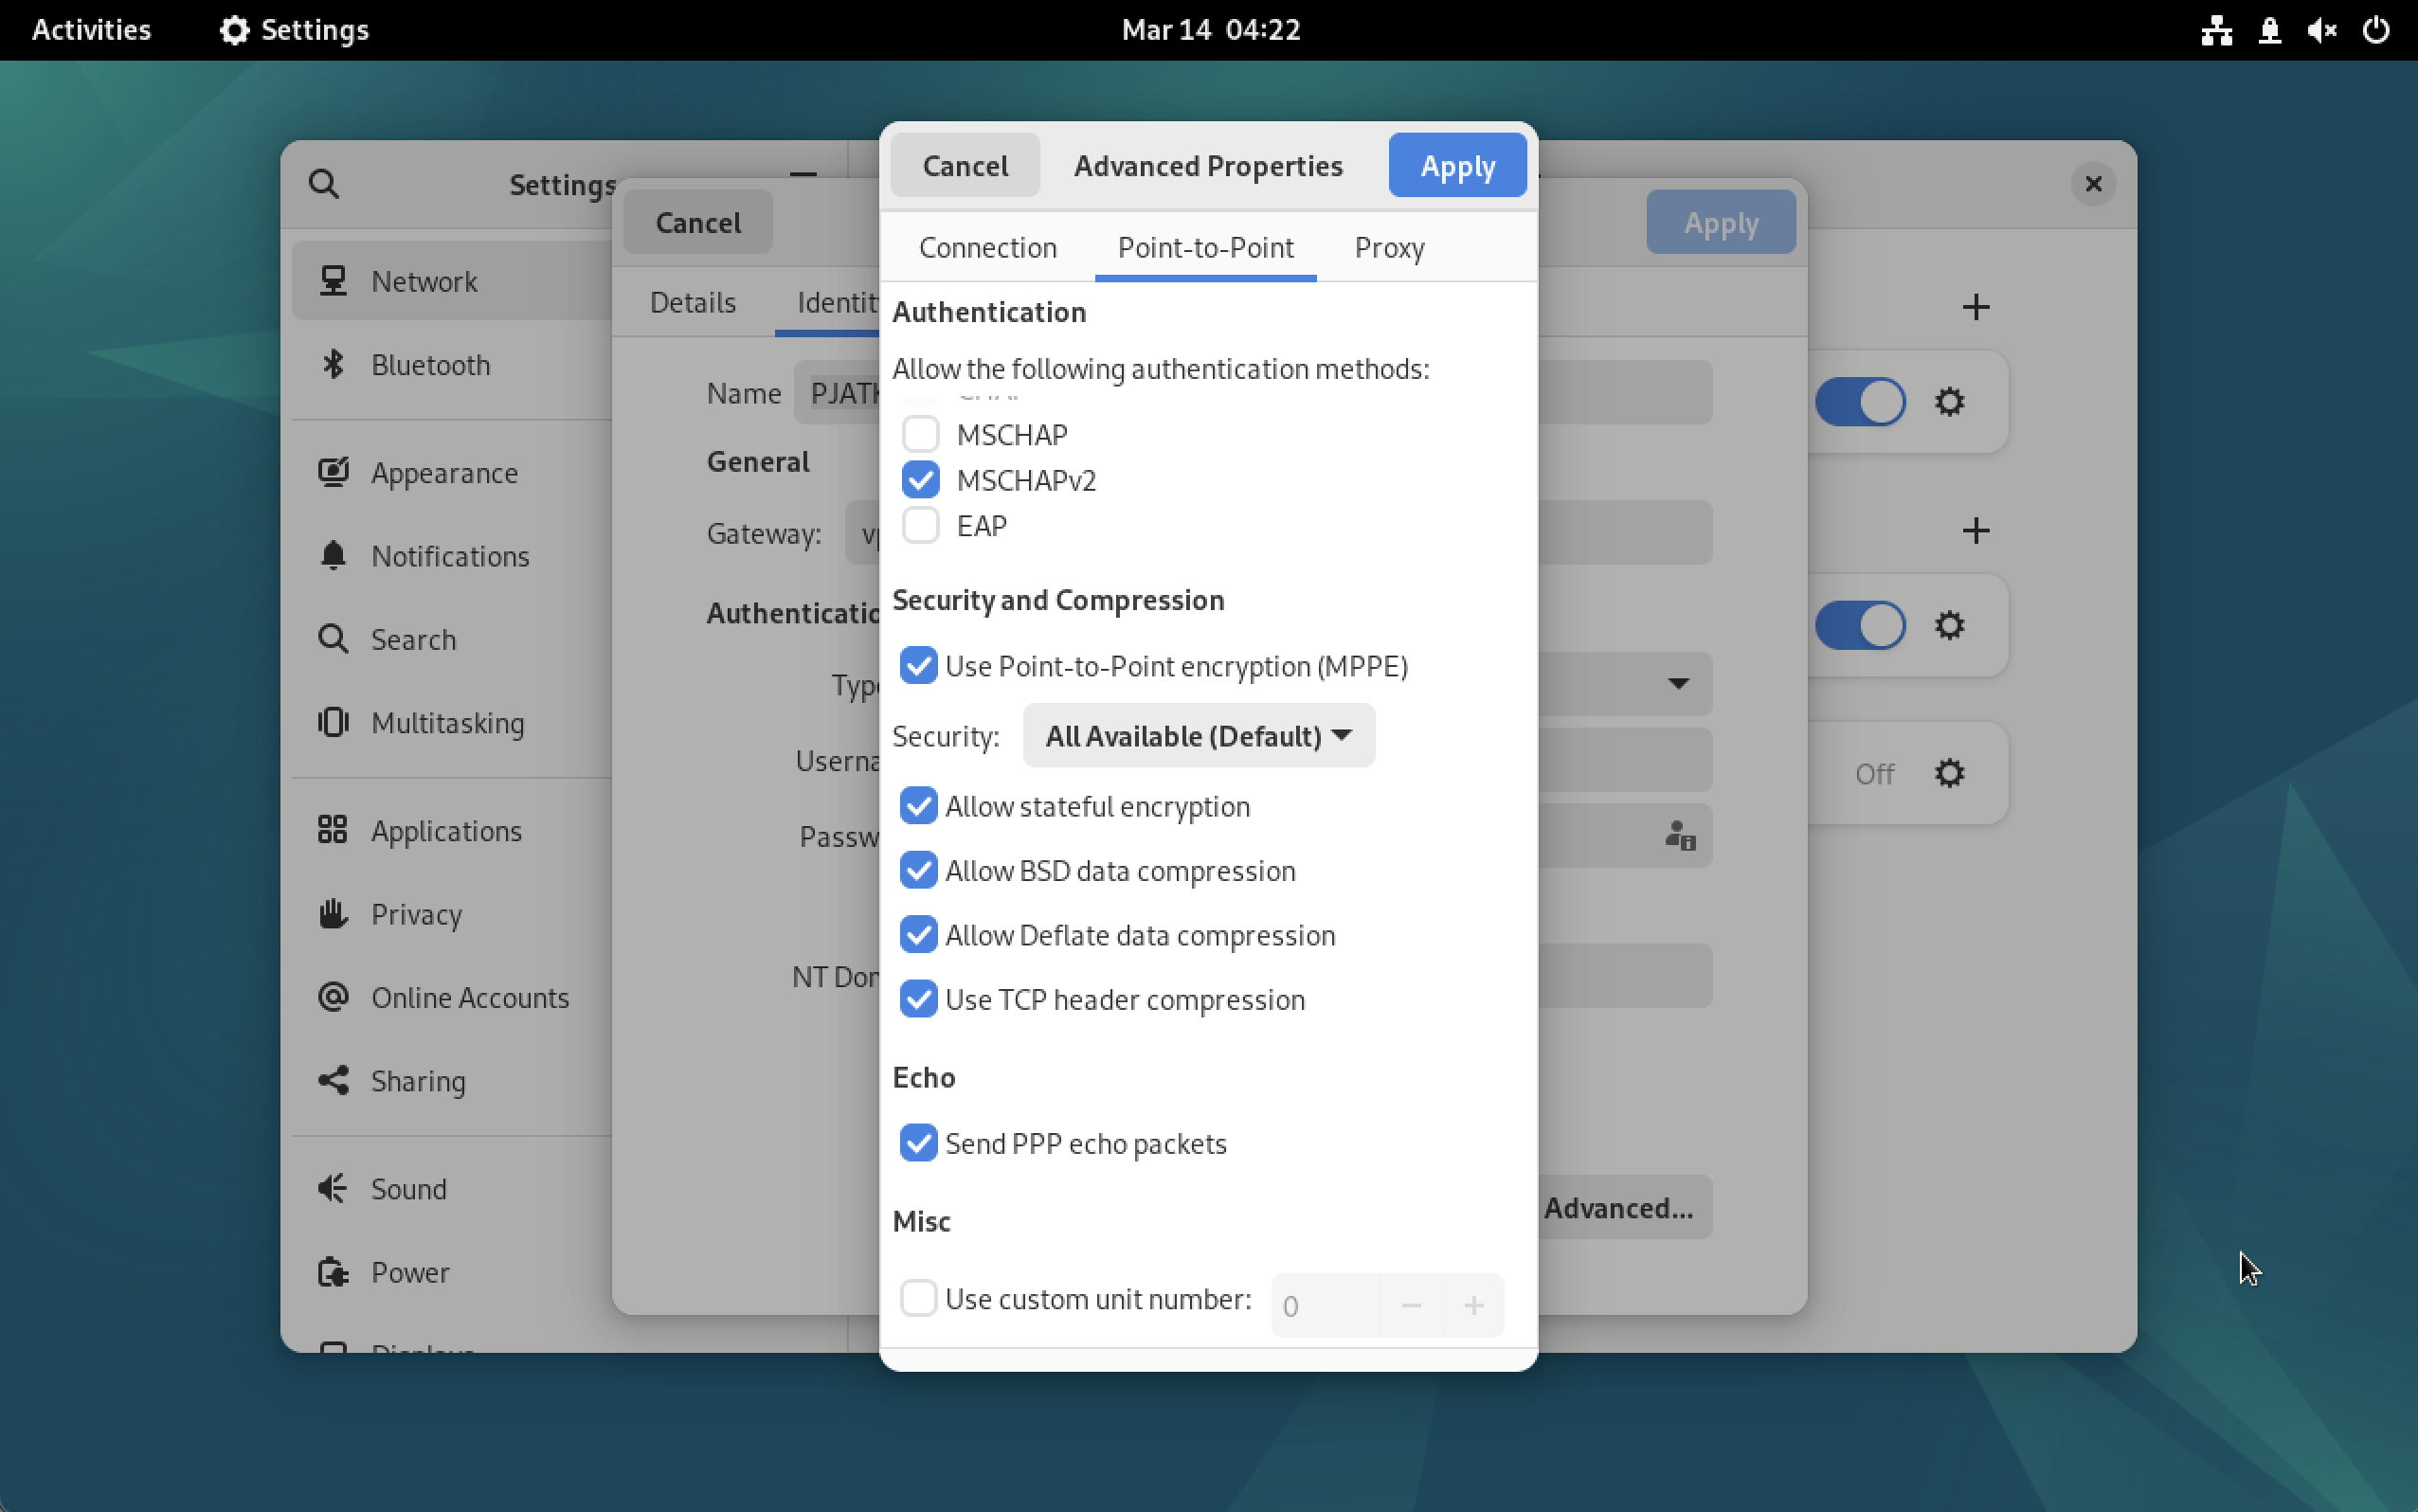
Advanced Settings
Click Advanced… and configure Point-to-Point:
- Uncheck all methods except Microsoft CHAP, version 2 (MS-CHAP v2).
- Check “Use Point-to-Point encryption (MPPE)” ->
All Available (Default). - Check “Allow Stateful Encryption”.
- Check “Allow BSD data compression”.
- Check “Allow Deflate data compression”.
- Check “Use TCP header compression”.
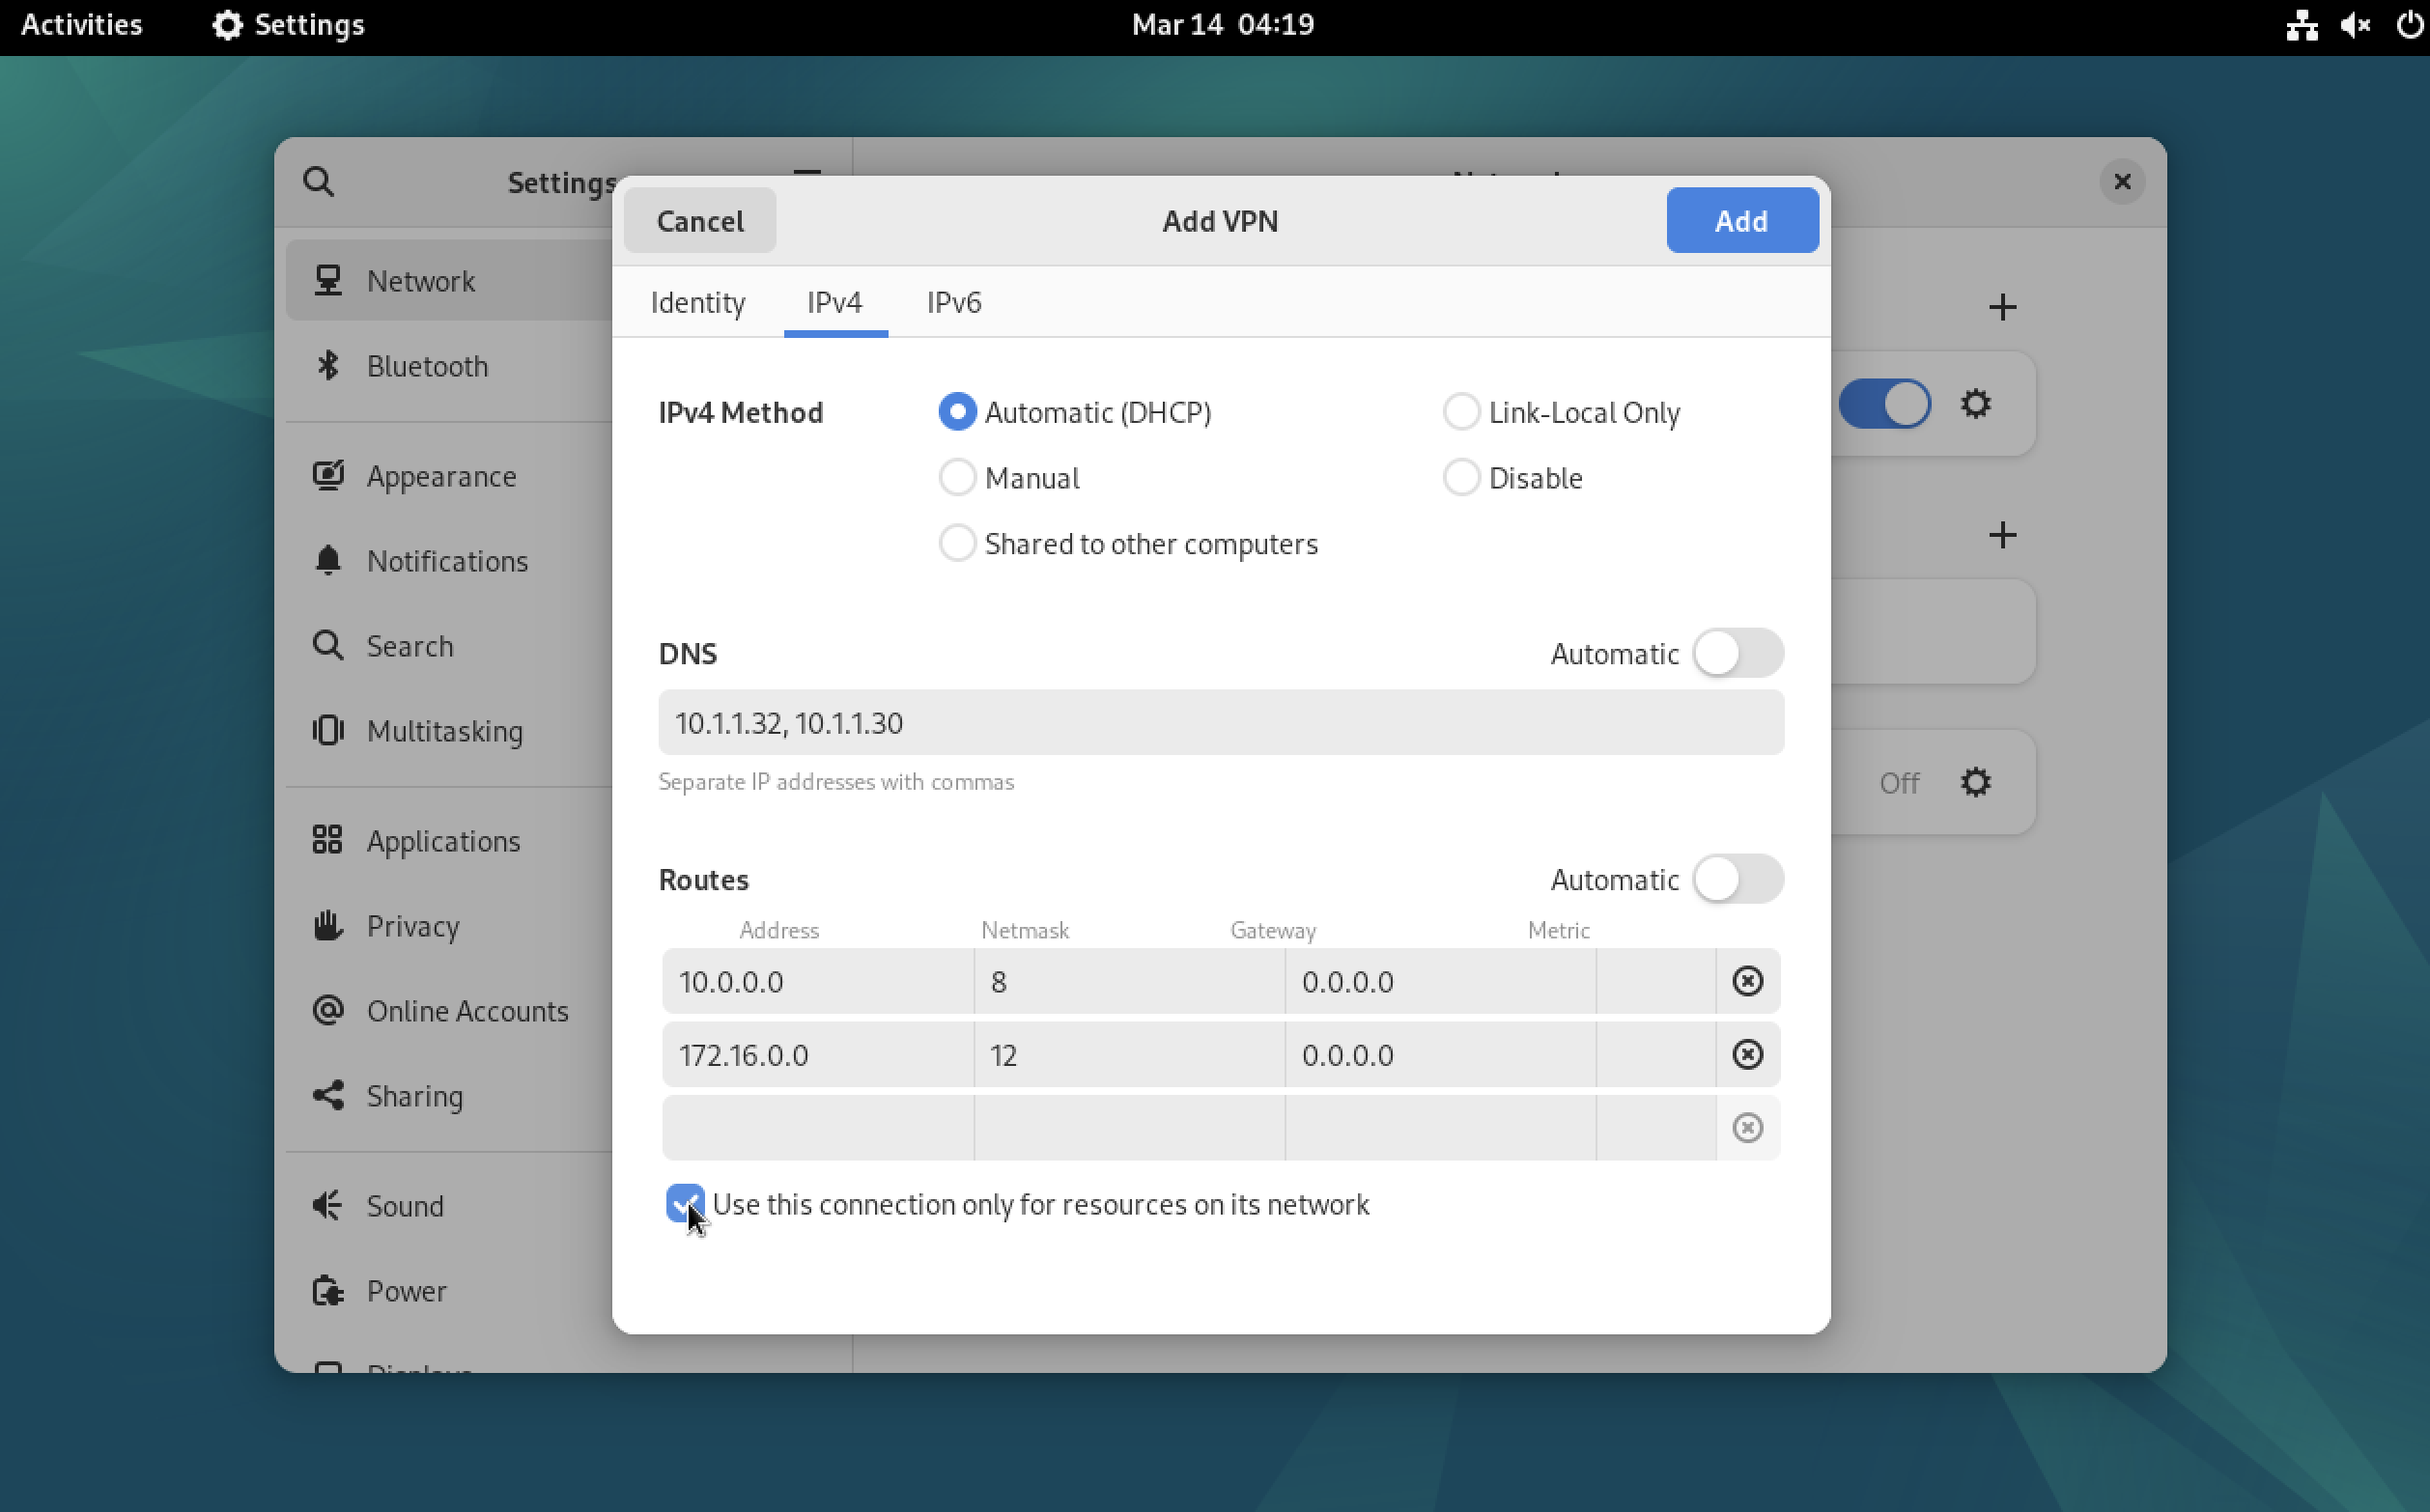
IPv4 Routing
Go to the IPv4 tab:
Check: “Use this connection only for resources on its network”.
Uncheck: “Automatic” (DNS) and “Automatic” (Routes).
DNS: Enter
10.1.1.32, 10.1.1.30.Routes: Add the following:
10.0.0.0 8 0.0.0.0
172.16.0.0 12 0.0.0.0
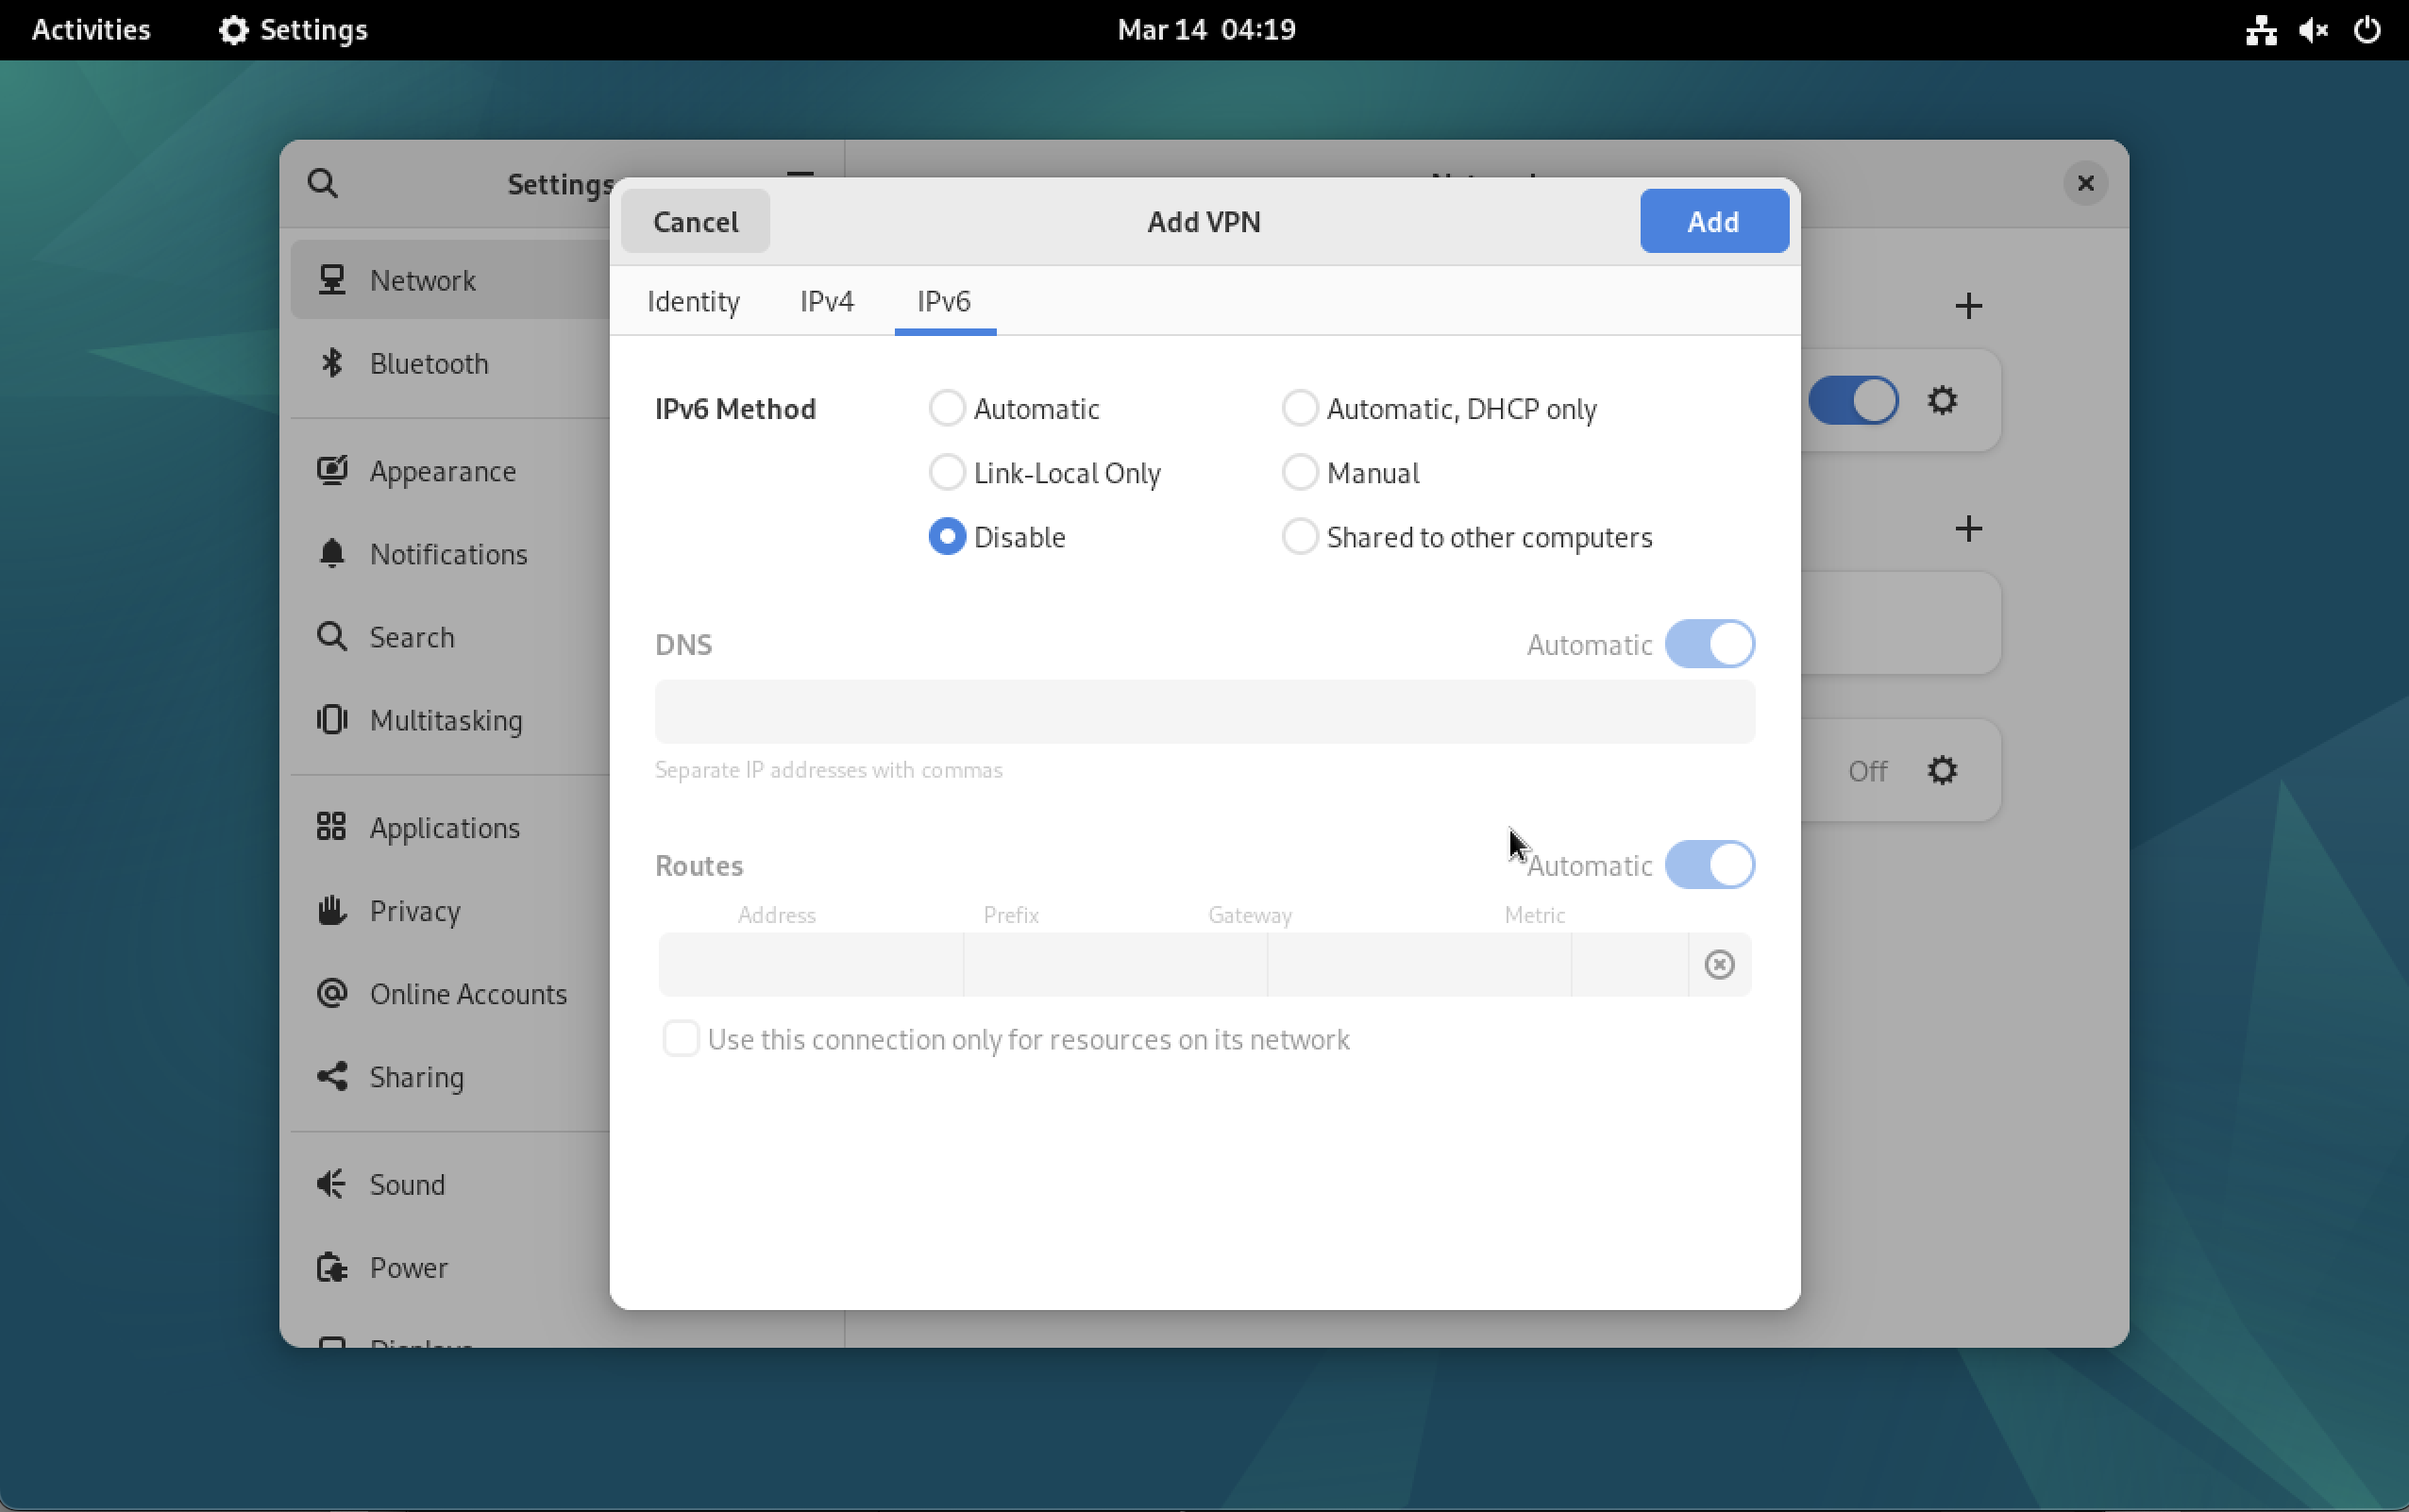
Disable IPv6
Go to the IPv6 tab and select Disable.
Connect
- Click Apply to save.
- Toggle the VPN switch to ON.
Connected!
You should now have access to internal resources like the Z: Drive.