Shared Disk on Linux
Prerequisites
VPN Required
To access the Z: drive from home, you must have an active VPN connection.
This guide covers Debian, Ubuntu, and other derivatives.
Configuration
Graphical Method (Easiest)
Install Packages
Open Terminal and run:
sudo apt install gvfs-backends smbclient cifs-utilsApply Changes
Restart your computer or log out and log back in to ensure plugins are loaded.
Connect via File Manager
Open your File Manager (Nautilus, Dolphin, etc.).
Go to Other Locations.
In the Connect to Server bar (usually at the bottom), enter:
smb://win-zet.pjwstk.edu.pl/Users/sXXXXX(Replace
sXXXXXwith your student ID)

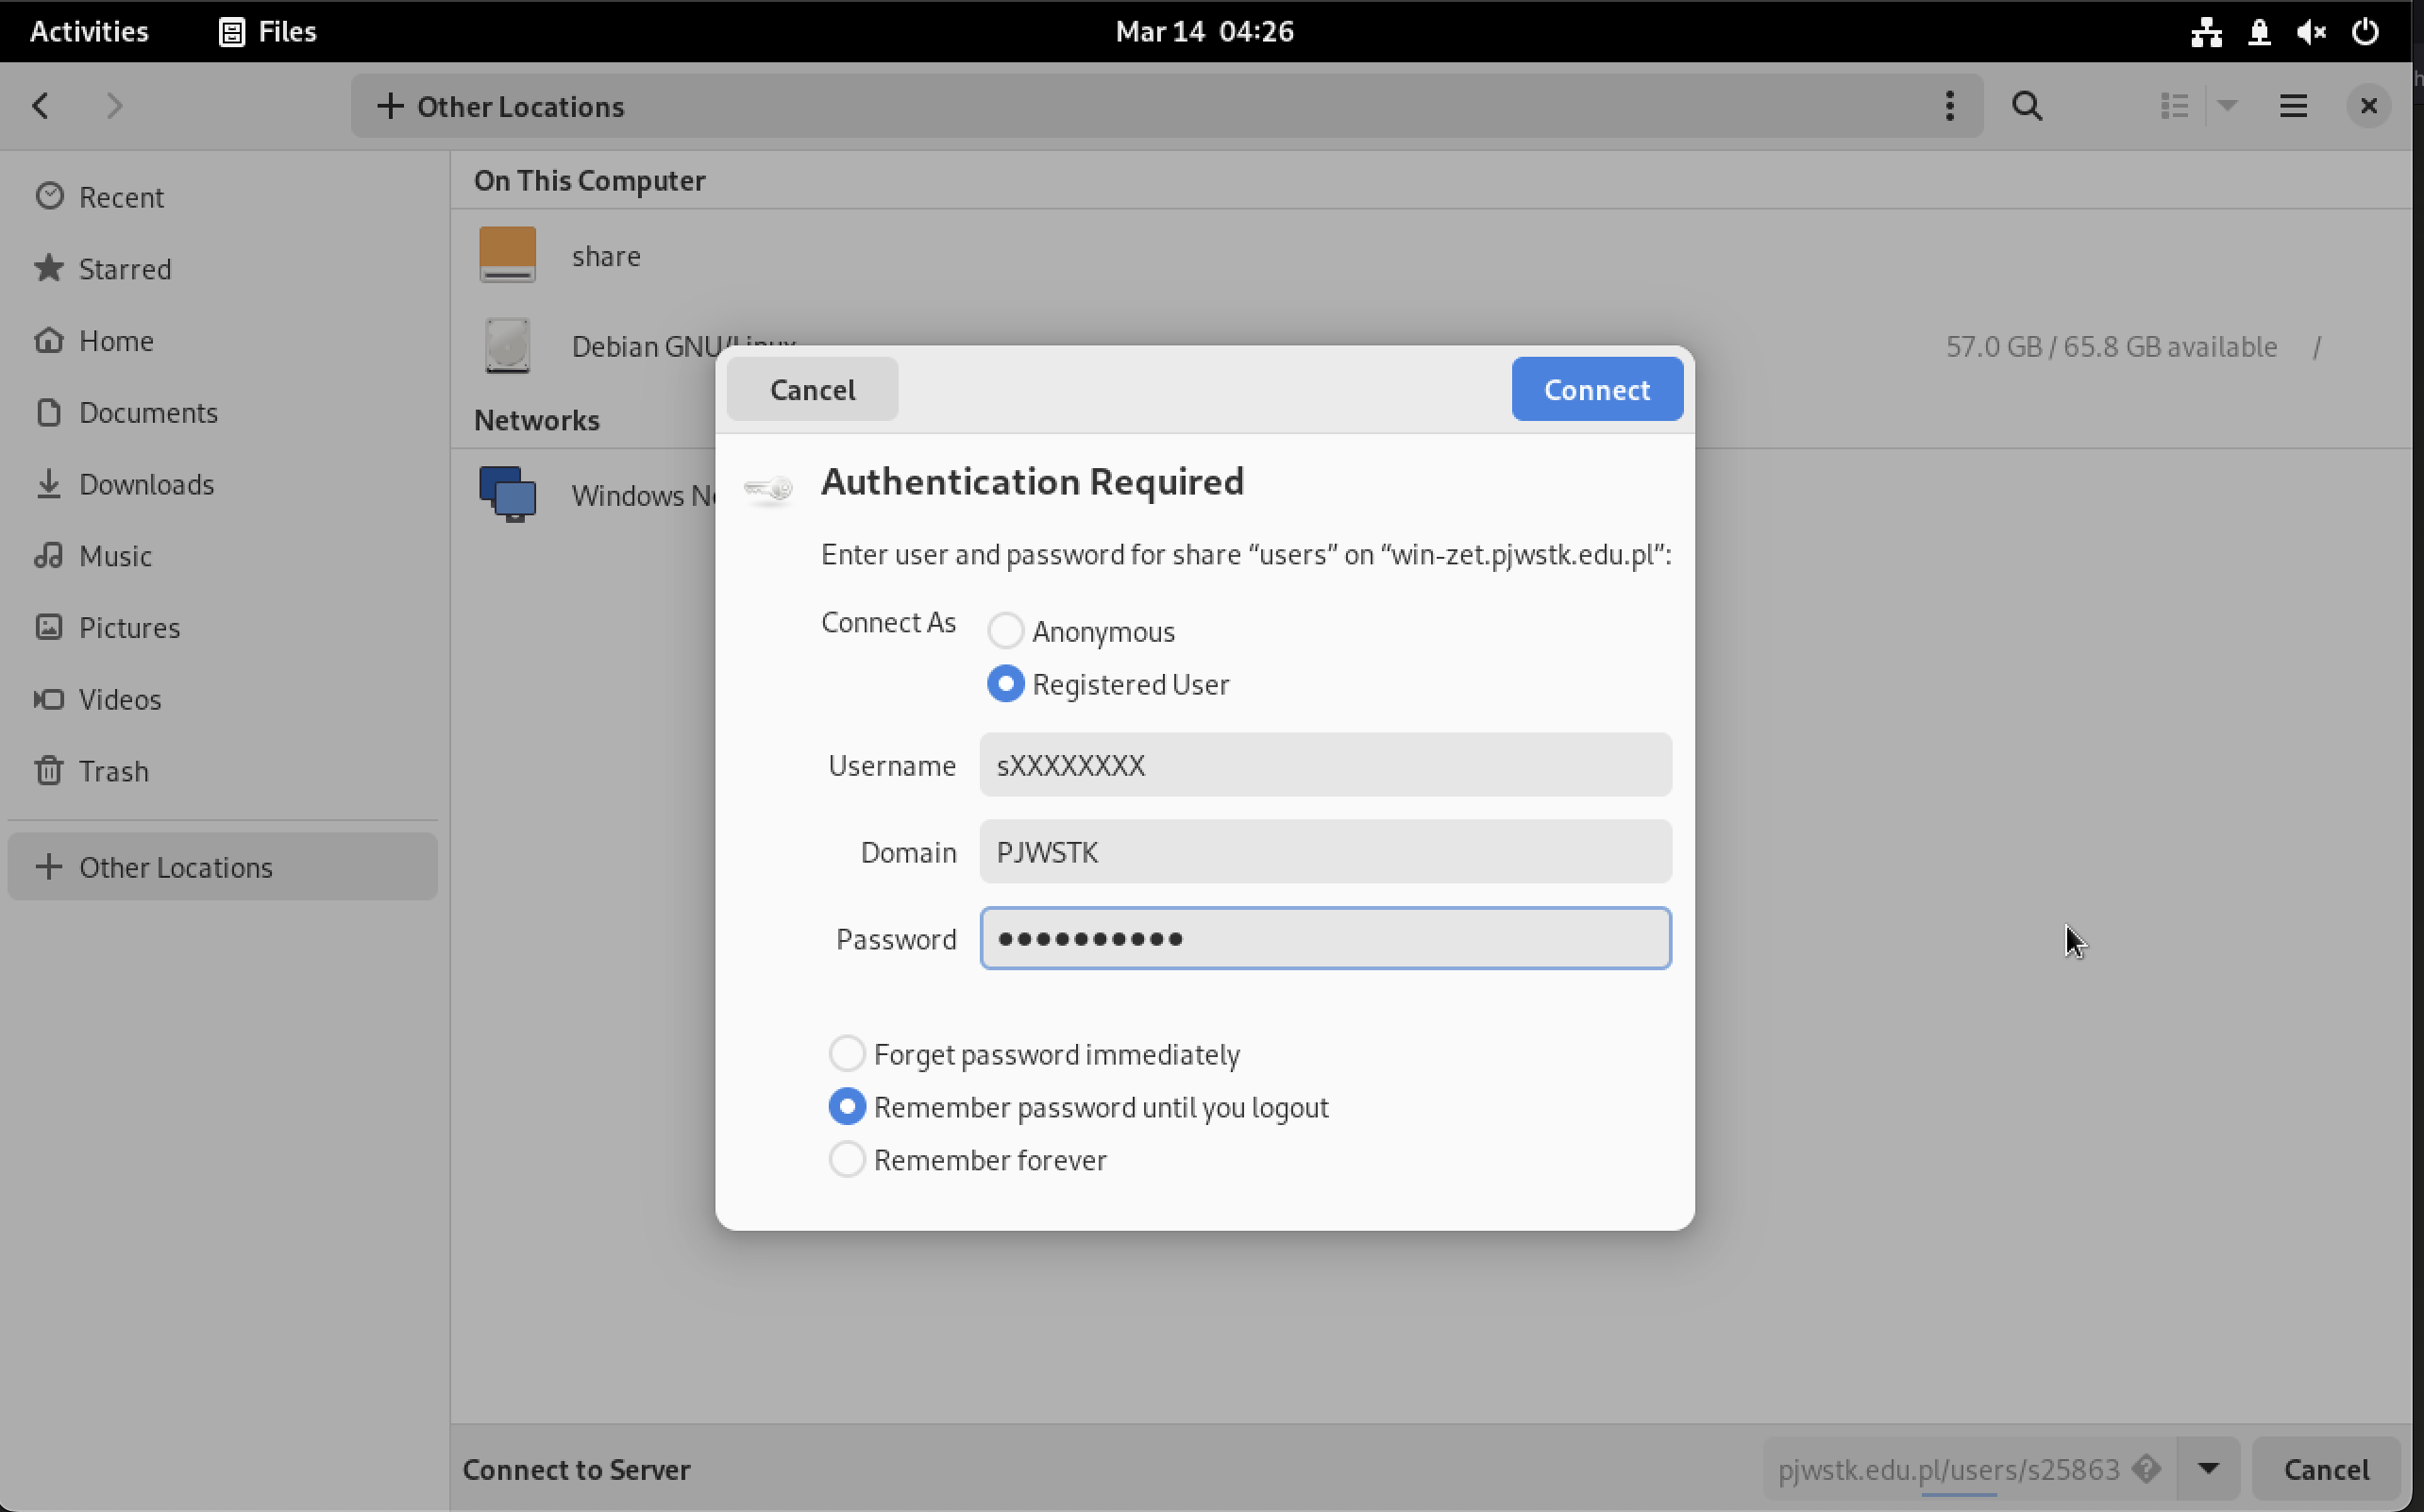
Authenticate
Log in with:
- Username:
sXXXXX - Domain:
PJWSTK(if asked) - Password: Your student password
Troubleshooting
Common Issues
- Access Denied: Verify your VPN is connected (green lock icon).
- Wrong Password: Ensure your PJATK account is not locked.
- Protocol Error: Some older distros might need
vers=3.0added to the mount options.